Jupyter integration#
Elsie has built-in support for creating slides interactively using Jupyter. If you return a box from a Jupyter notebook cell, it will be rendered directly inside the notebook:
import elsie
slides = elsie.SlideDeck()
slide = slides.new_slide()
slide.box().text("Hello world")
slide
If you create slides using the decorator approach, you need to return the decorated function from the cell:
import elsie
slides = elsie.SlideDeck()

@slides.slide()
def hello(slide):
    slide.box().text("Hello world")
hello
If your slide contains multiple fragments, there will be two buttons below the slide which will let you move between the individual fragments:
slide.box().text("Box 1")
slide.box(show="next+").text("Box 2")
slide


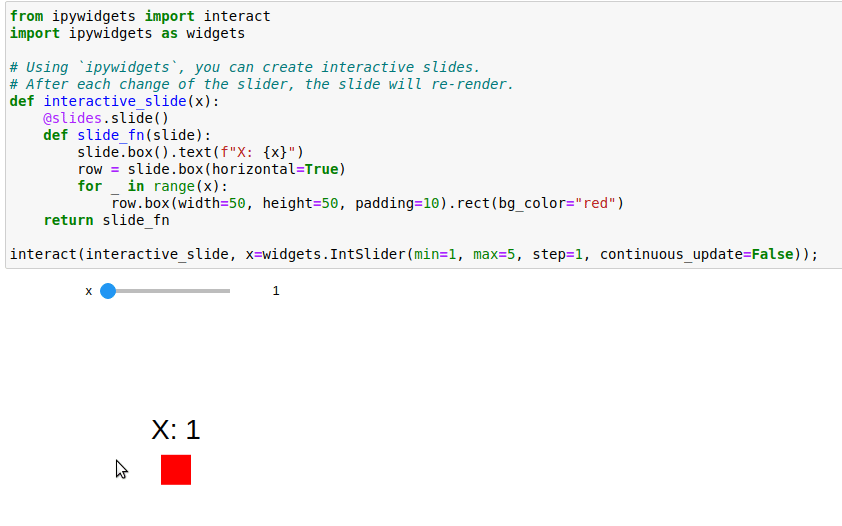
If you use something like ipywidgets, you can create fully interactive slides. For example, you can create something like this:
You can see an example of Jupyter integration here.
Name policy inside Jupyter#
The name policy is automatically set to replace when running inside
Jupyter. Therefore, if you re-run a cell which creates a slide with the same name as in the previous
cell execution, the previous slide will be removed. Otherwise, you would create a new slide for each
execution of a cell, which might not be what you want. To make the process of naming slides easier,
we recommend you to create slides using the decorator, which will name them
automatically, according to the name of the decorated function.
Note that after modifying a cell with a slide when using the replace policy, you should also
execute all the following cells with slides to not change the order of slides. In general, creating
slides inside Jupyter is designed for interactive experiments with complex slides. For a final
render, you should either copy your code into a Python script or restart the notebook kernel and
reexecute the whole notebook from the start.